Beautiful and neat handwriting is an entire art, and anyone can master it if they wish. Even if you are sure that your style of depicting letters has been developed over the years, and due to age, it is too late to change anything.
The learning process is painstaking, it takes time and energy, but the efforts pay off with the beautifully written name of a loved one and just any beautiful number or letter.
A lot of advice and scientific works have been created about this. The basics of calligraphy were taught in schools a couple of decades ago, but now the subject is outdated and is not included in the curriculum. However, beautiful handwriting in everyday life is not the skill of slowly and patiently writing beautiful letters, but the constant use of abilities.
Definition of the concept
Calligraphy is the art of designing characters in a masterly, harmonious and expressive manner. Literally translated as “beautiful handwriting.”
For the first time, the term, which denoted writing that stands out for its beauty and clarity, was mentioned in Europe in the sixteenth century. But the origins of this art were discovered long before such writing received a name. De facto, calligraphy originated and began to develop when people just started using symbols to convey information. An example of the art of writing in beautiful and even handwriting is hieroglyphs (four thousand years BC). The writing of the Egyptians was supplanted by the Greeks in the third century BC, and from about this point onwards writing with different techniques is observed in all parts of the world.
Nowadays, the main forms of calligraphy are cards, wedding greetings, fonts, graffiti and graphic design. However, its importance in the same educational process is clearly underestimated. Among large Japanese companies, calligraphy lessons for employees during lunch breaks are common. According to company executives, this expensive activity is good for health and creativity. But the Japanese are the most efficient, creative in the field of development and advanced nation. Back in the 80s of the last century, calligraphy won an interesting experiment by one of the largest companies (we are still talking about Japan), the goal of which was to find methods for training specialists of the future.
Calligraphic handwriting refers to the technique of legible, neat writing. Teachers, archive workers, librarians are examples of professions for which calligraphy is a necessity, not a whim.
Introductory video tutorial.
Choosing a style
When using the calligraphic writing method, you can stylishly design invitations and greeting cards, notebooks, photo albums, as well as posters and other things where aesthetics are important. In addition, calligraphy exercises will help correct your writing style, which is especially important if a person writes “like a chicken with its paw.”
You can exercise at any age. A few practices, following the rules, perseverance, and your handwriting will become beautiful and legible.
There are several styles of calligraphic writing:
- elegant - a combination of classics and curls;
Elegant style
- romantic - lace writing with curls and slant;
Romantic style
- eccentric - smooth lines combined with angles;
Eccentric style
- cheerful – playful and rounded lines.
Cheerful style
The style is chosen depending on the situation and purpose of the letter. For example, an elegant method is used when designing invitation cards.
Required accessories
The first step to mastering calligraphy is choosing a set of accessories. You will need:
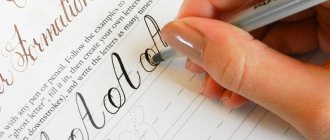
- pen or rollerball pen. First - for more experienced ones, feathers are divided into broad-pointed and pointed;
- notebook, paper;
- easel.
The best and most affordable broad-nib pen options for beginners:
- Leonardt;
- Speedball;
- Brause&Co.
They come with or without holders . Holders are more convenient; the best option for beginners is plastic or cork.
At the first stage, the difference between the feathers is insignificant, so choose according to your taste. To properly insert the pen into the holder, first make a wedge. It is placed in the middle of the petals and metal rim. The feather is attached from the side, not in the center.
Video tutorial for beginners.
There are special nibs for left-handed people. We draw your attention to automatic wide-point Japanese handles. They come in different sizes - from 1 to 6 mm. For beginners, we recommend taking the wider ones.
Pointed nibs are used for so-called “pressure” writing styles. They have a split in the center; when pressed, the tendrils spread out and the line thickens. Among the inexpensive and accessible feathers is also the Asterisk.
Once the pen and holder are assembled, it's time to think about what you'll be writing on. Not all paper is suitable for calligraphy. If it is too loose or thin, the pen will not be able to slide and the ink will spread. Thematic stores will quickly help you with your choice, but if this is not possible , then select a material for sketches or one that does not absorb ink very much.
As for ink, it is better to buy Sumi or Speedball. In the first stages, it is preferable to use Gamma and KOH-I-NOOR ink; they are cheap and available in every office supply store.
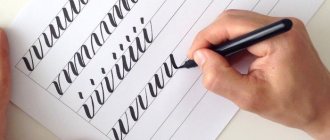
A useful exercise that will help you hone your calligraphy skills.
Calligraphy copybooks
We recommend using calligraphy, this is an easy way to correct handwriting. The model before your eyes influences the intuitive copying of style and correction of errors. Give it a try if you want to work on your writing style without taking courses or hiring teachers. You can take the manuals that are recommended for first-graders ; they are very well compiled.
As with any training, it is important to take care of the workplace. The table should be comfortable, remove everything unnecessary from it, organize lighting (you need a lot of light). If you are not going to use copybooks, you should draw out the paper sheet yourself. For beginners, it is better to use a simple pen, and eventually move on to the technology of writing with pens.
Useful exercises for beginners.
Preparing a Traditional Pen
For writing, a quill quill was most often used; turkey or crow quills were less commonly used. If you are right-handed, then the third or fourth flight feather from the left wing of the bird is suitable for writing; left-handed people should take a right-wing feather. This makes the tool more comfortable to hold in your hand. It is difficult for us to imagine how we used to write with a pen, because there is no place for ink to accumulate. However, we lose sight of the process of preparing writing instruments for use. First, a groove was hollowed out in the pen, into which the ink was collected, and the edge of the instrument was ground down at an angle. Feathers used to be even hardened like metal - to give them strength they were boiled in a lime solution.
Fake calligraphy
Fake calligraphy is cursive that will teach you how to use a fountain pen. This is an important technique for gaining the skill of writing on any surface. It takes more time than working with a fountain pen, but if your goal is a simple phrase, then you will definitely appreciate the result. Fake calligraphy is an easy and fun way to learn the basics of calligraphy. By the way, people often do not distinguish it from the genuine one.
First, write a phrase in regular cursive as best you can. Then draw lines to indicate the thickening. They appear by moving your hand down or up to create part of the letter (parallel to it). After marking all the bulges, you need to fill in the empty areas. Ready!
Write with a pen that is comfortable for you
And here, to each his own. Finding that very pen that you can work with will be oh so difficult! For myself, I chose the Pilot G2 05 because of the wide strokes, body and nice dark black ink color. I also like how easy it is to write - you don't have to strain your hand to make a clear stroke.
What is the difference between ballpoint, gel and rollerball pens?
Now the choice of pens is truly huge, so I advise you to go shopping. Grab a couple here, a couple there and try them out! And it doesn’t matter which pens you prefer: gel pens, fountain pens, fountain pens... The one with which you feel a connection will be ideal.
About writing technique
Russian calligraphy has no fundamental differences from others; the rules are universal.
hold a fountain pen in the same way as a ballpoint pen, but it is still recommended to do it correctly. It is important to hold the pen firmly. The ring finger and little finger are the support, the middle finger supports the handle, and the thumb and index fingers hold it.
A ballpoint pen must be handled more harshly and pressed, but a fountain pen must be handled gently, otherwise there will be splashes.
Once you have practiced holding a pen, you can start writing. Have some water ready—you'll be rinsing the pen every few minutes. Dip the pen into the ink until it reaches the middle of the well and get to work.
For you - a free calligraphy lesson for beginners.
Do the exercises according to the instructions
If you want to consistently work on your handwriting, I have prepared copybooks for you! These are three sheets of exercises mainly for cursive, and you can download them from this link. With their help, you can practice writing curls, capital and lowercase letters, as well as words and whole sentences.
The italics presented in the copybooks are not strictly machine-written. On the contrary, I focus on the style of letters and words that I use every day. These characters are easy to write and flow smoothly into one another when written.
Beautiful painting
Painting is the business card of each of us; it should look intricate and, of course, stylish. Master classes and thematic literature will not help here, and this is not something that is invented in a few hours. As a rule, when a person first has to sign, he instinctively writes the first letters of his first and last name and some kind of tricky curl.
If you decide to make changes, it’s worth understanding what exactly you’re not happy with and looking at samples of high-quality signatures. You can try to change the style , add some elements or work on the angle of the letters. The image of the owner depends on the elegant signature; forget about childish gobbledygook.
How to evaluate the quality of writing and understand what needs to be improved
To understand how to learn to write beautifully with a pen at home, you must first identify your weaknesses in writing. They may be hiding in the following:
- Form. The letters may have a distorted shape that barely resembles what is needed;
- Incline. Incorrect slant or lack thereof makes handwriting unattractive;
- The height of letters with inappropriately large, small or alternating values will also not delight the reader;
- Correct spelling. We write some letters incorrectly, for example, making U and Ch slightly different.
Also important points are: the pressure on the pen when writing, the spacing between individual letters, the ability to adhere to horizontal lines on paper.
Evaluate your handwriting with the above in mind and identify your weaknesses. Then you just need to practice regularly and after 2-3 months you yourself will be able to tell your friends and acquaintances how to learn to write beautifully as an adult.
As for the issue of writing speed, there is only one sure-fire way to increase it - write as much and as often as possible. Practice works wonders in any endeavor.
There are no secrets in how to learn to write quickly and beautifully.
Use copybooks and lined sheets, stretch your fingers, carefully draw out complex elements of individual letters, do not go too small - this will help you achieve success. Even 25-30 minutes of practice a day is enough to significantly improve your ability to write beautifully. How to learn to write beautifully
Correcting handwriting in an adult
The principle of teaching beautiful handwriting is similar both for children and for those who want to learn this at a more conscious age. You need to prepare a workplace, stock up on paper and pen, as well as copybooks in the Russian or English alphabet.
Procedure:
- Start preparing a full-fledged place to work.
- Create conditions for correct body position: keep your back straight, your elbows should lie on the table and not hang down.
- Place the exercise paper approximately 30cm away from your eyes.
- Hold the ballpoint pen with your thumb, middle and index fingers, the distance from your fingers to the paper is no more than one centimeter.
- Choose letters and repeat writing as many times as necessary to achieve the perfect result.
You will have to hone your concentration skills, become patient and even meticulous. Various techniques are used for quick learning:
- If the letters turn out to be too large or small, then use a notebook or a special stencil. You need to strive to stay within the lines. After extensive training, you will be able to enter letters into given fields on autopilot.
- If the letters are not connected, you must try to write without lifting the pen from the paper.
- If there is strong pressure, the correct body position is formed. It's about posture and relaxation of the shoulders and arms.
Calligraphy is not only about neat writing, but also about preserving the author's style. Having understood the basics of the art of beautiful handwriting, improve yourself, expand the range of tasks, and do not limit yourself to block letters alone.
And don’t despair, if something goes wrong, you will certainly succeed!
Such different feathers
By the way, feathers can be very different in their technical characteristics. There are wide-scale pens and devices for small writing. In this case, the size speaks for itself - the larger the nib, the larger the font it will be suitable for. The thickness of the letters depends on the flexibility of the pen: the more the pen bends, the greater the distance between the teeth becomes and the more ink is poured onto the paper. It will be difficult for a beginner to cope with the task of distributing pressure and controlling the amount of ink, so to begin with it is better to choose the least flexible pen. The same applies to the width of the tip - beginners and those who are just mastering the technique of writing with a pen should buy a tool with a thin tip. It will allow you to draw the neatest lines.
Impaired spatial perception
As a rule, this problem is easily solved. However, this does not mean that it can be ignored. If the mother notices how the baby confuses the letters, or sees that they seem to be hanging in the air, there is no need to force the baby to rewrite the work a hundred times, this will not solve the problem. Such handwriting only acts as a manifestation of underdeveloped perception of space. It's better to choose the right exercises. The game “Capricious Photographer” will help correct the situation.
Let the child place his favorite toys in a row. The parent will have to play the role of a capricious photographer who always wants to transplant the animals. Either he asks to remove the bear from the fox and place it near the mouse, or he wants to place the bunny to the right. Such a fun game helps the child develop spatial perception.
The so-called graphic dictations are also shown, when children draw lines along the cells according to a given algorithm. The result, if everything is done correctly, is a funny image.
In general, parents should not forget that writing is not an easy science. Under no circumstances should you overload your baby. It is necessary to plan classes so that the child takes a break every 15 minutes. If you have a long text to write, it is necessary to break it down into stages so that fatigue and irritation do not arise.
There is no need to force the baby to write in a draft; it is much better to use tracing paper. Let him put it on a sheet of paper with a printed sample of letters. First, the child traces the element several times on tracing paper, and then writes the letter in the notebook without it. This allows you to create beautiful handwriting.
A zebra stripe, a piece of paper with slanted lines at equal intervals between them, will also help improve calligraphy. The paper is placed under the notebook page and the letters appear along the illuminated lines. This allows for uniform slope and size. The work looks very neat. The use of “zebra” is shown not only for kids. This method makes it possible to improve a teenager’s handwriting. The exercise is simple, but very effective.